2:55:00 PM
Turn a woman into an alien by combining two photos. This tutorial will teach you several photo manipulation techniques for creating scary photo manipulations.
Alien Photo Manipulation Photoshop Tutorial
Preview of final results

Stock Photos
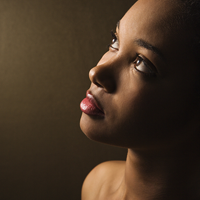
For this tutorial, you’ll need a photo of a persons head, octopus, and any grunge texture. If you like to use the same portrait of the face used in this tutorial, you may click on the image below to purchase it. Note that we only have the download link for the image of the woman.
Step 1 – Open the octopus photo
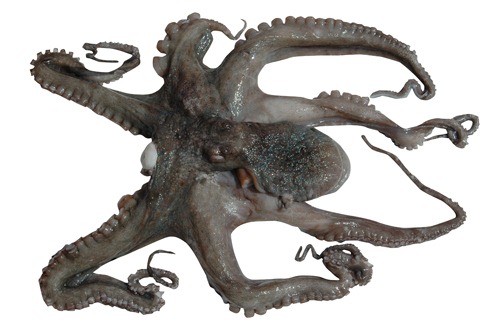
Begin by loading the image of the octopus.
Step 2 – Detach an arm from the octopus
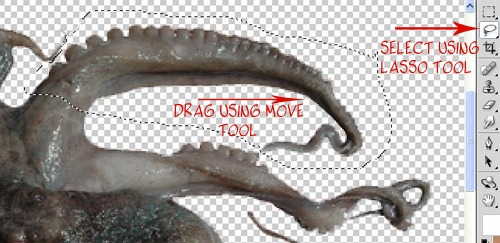
First, delete the white background. To do this, use the magic wand tool to create a selection of the white background then press delete on your keyboard to remove the background. Select the lasso tool and create a selection of one of the arm. Then, press Ctrl+J to create a new layer with the selected areas as its content.
Step 3 – Combine several arms together
Repeat the previous step several times until you get about five arms. They should each be on their own layers. Start by using the transform tool (Edit > Free Transform) to rotate, resize, and position them together like the image below. Add a layer mask to each of the layers then, with a soft brush, erase in the layer mask to blend the arms together.
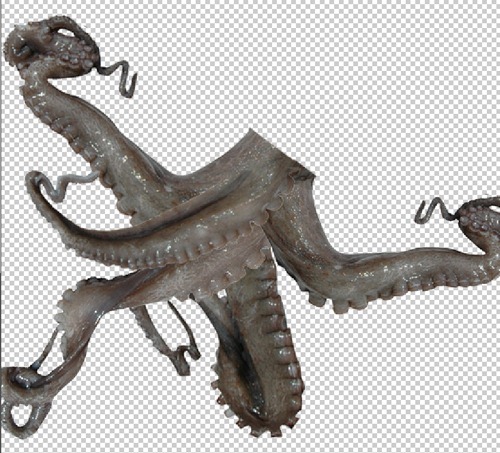
Step 4 – Combine the octopus arms with the portrait photo
On the document with the octopus arm, copy the entire image into the clipboard. To do this, press Ctrl+A to select all then press Shift+Ctrl+C to copy merged. Open the portrait photo then press Ctrl+V to paste the octopus arms. Position it on the mouth. Add a layer mask to the layer with the octopus arms then, using a brush with a hardness setting of 0%, erase the edge slightly to blend it with the face.
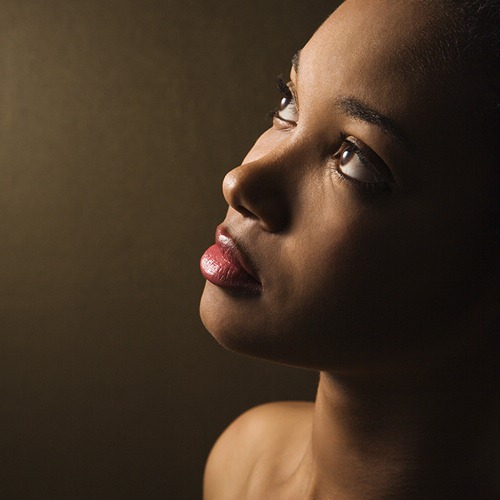
Step 5 – Manipulate the eyes
Now let’s work on the eyes. Start by using the clone stamp tool to distort the eye. Hold the Alt key and click on a white area then click in the colored area.
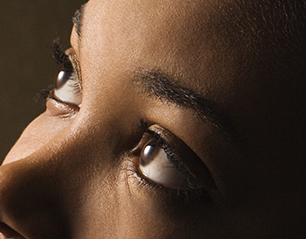
Use the dodge and burn tools to manipulate the eyes further. Start with the burn tool to create small holes then use the dodge tool to add some highlights. Use your creativity and don’t worry too much about how it looks.
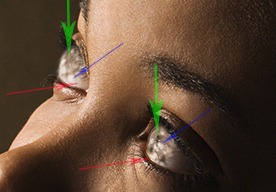
Step 6 – Apply a color effect with adjustment layers
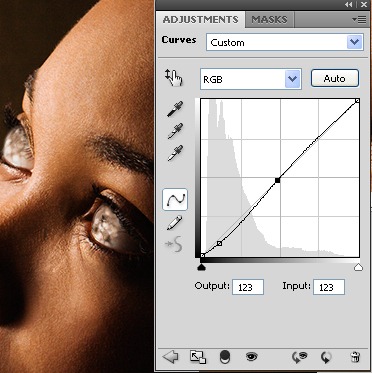
Choose Layer > New Adjustment Layer > Curves to add a new curves adjustment layer. Use the curves adjustment layer to make the image a little darker.
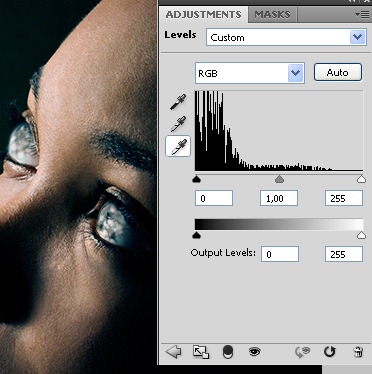
Now add a new Levels adjustment layer by choosing Layer > New Adjustment Layer > Levels. Click on the black point eye dropper tool and click on one of the darkest areas in the image. Select the gray point eye dropper tool and click on the white area of the eye.
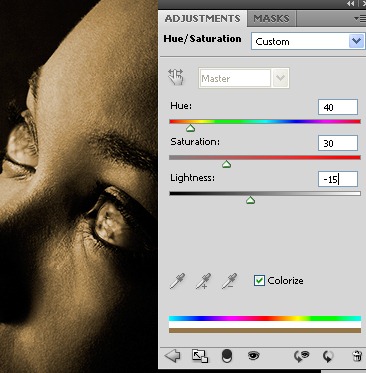
Add a new Hue/Saturation adjustment layer by choosing Layer > New Adjustment Layer > Hue/Saturation. Checkmark the colorize option first then adjust the settings as shown in the image below.
Step 7 – Use the burn tool on the face
Use the burn tool to darken some areas using a large brush with a soft edge. This will modify the look of the bone structure. Also spend some time to burn certain areas in the octopus arms to make the jaw look wider. You can make him look like Davy Jones in 'Pirates of the Caribbean: At World’s End.
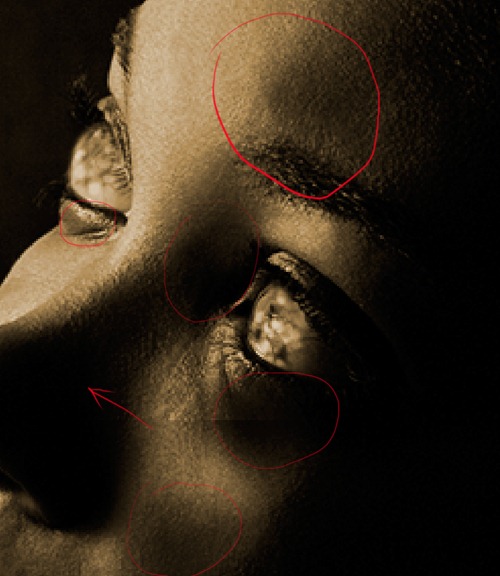
Switch to a small hard edge brush to burn some scars on the face like shown in the image below.
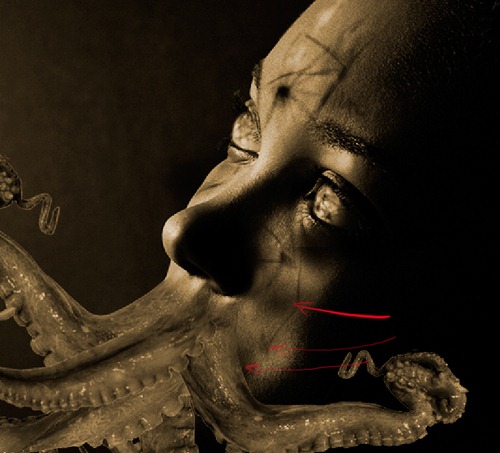
Step 8 - Add an alien skin texture
Start by opening the photo of a marble texture in Photoshop.
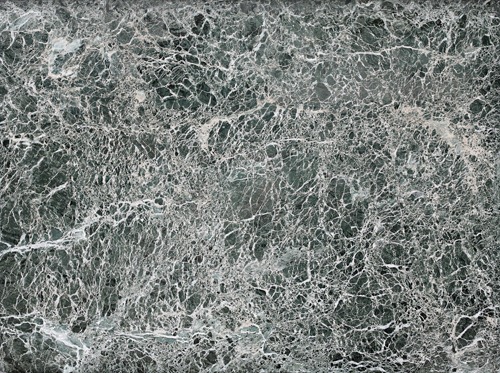
We’re now going to copy and paste the marble texture into the image we were working on. Choose Select > All then Edit > Copy. Close the current image of the marble texture to switch back to the alien image we were working on. Choose Edit > Paste to paste the texture into the current document.
Use the eraser tool with a soft edge to erase the marble texture so that it only covers the fast. Change the blending mode to difference.
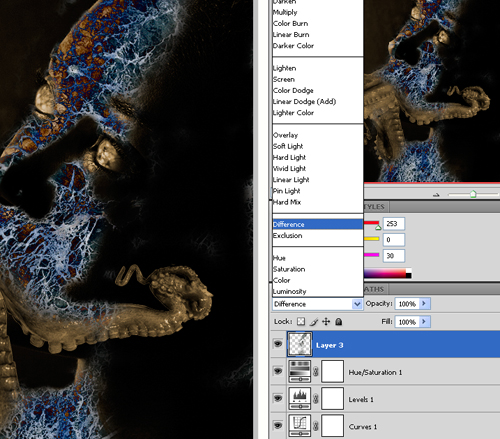
Lower the opacity to about 30%. One note to remember is that the difference blending mode will invert the colors of the layer depending on the layer below. So if you want more blue color on the face, you can use the burn tool on the layer with the face.
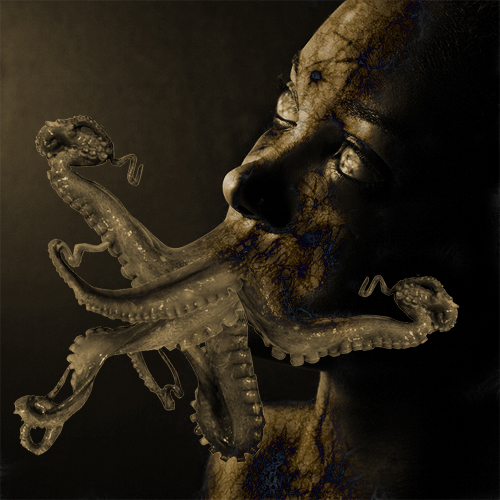
You can also move the layer with the marble texture below the adjustment layer to get an effect like this image:
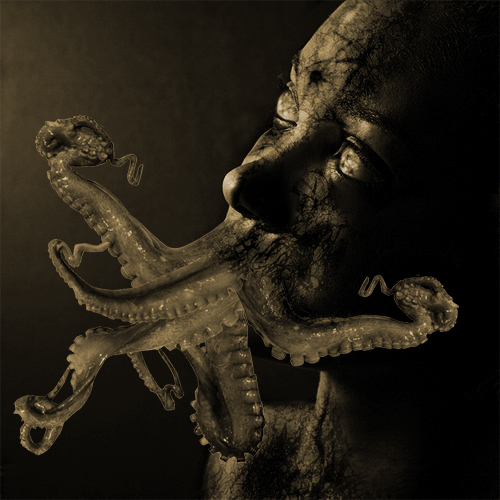
Step 9 – Add some abstract lines
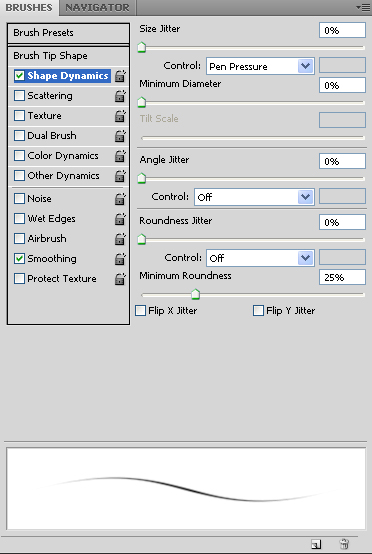
Select the brush tool with a 3 pixel brush and 100% hardness. In the brushes palette (Window > Brushes), apply the settings shown in the image below:
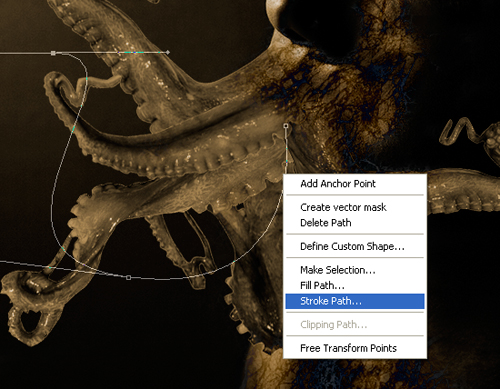
Select the pen tool and, in a new layer, create a curved path like the image below. Then, right click and select stroke path. Select the brush setting and enable the simulate pressure option.
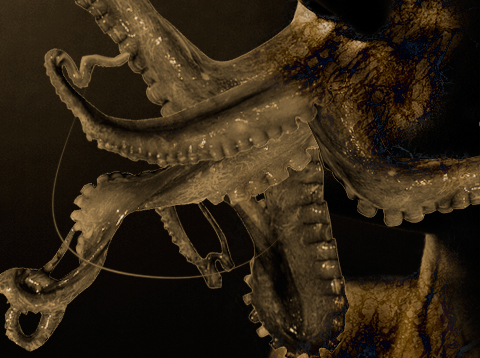
Right click again and choose delete path. Repeat this step to add as many abstract lines as you like.
Step 10 – Add highlights to the arms
It is helpful to have a pen tablet for adding highlights but this will work with a regular mouse too. We’ll create highlights by painting a thin white line.

Start by painting a line through the shape of the arm.
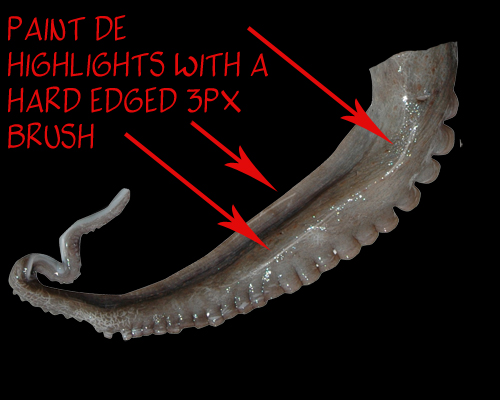
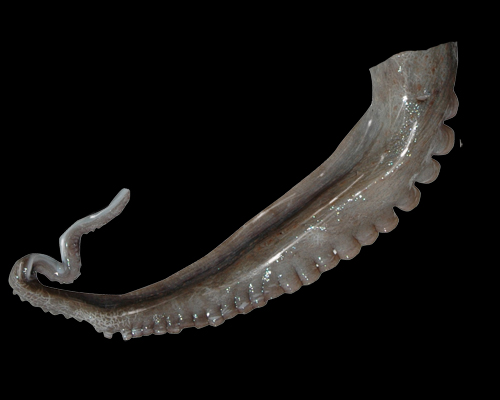
Here’s what our image looks like after adding some highlights":
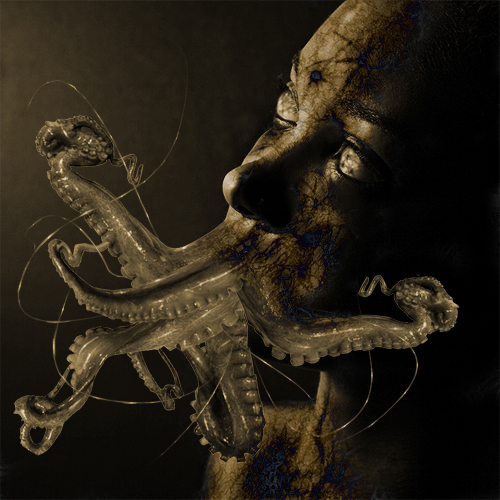
Step 11 – Enhance the arms
Select the burn tool and set the brush to a big and soft edged brush. Change the range in the option bar to highlights then paint the edges of the arms to make it darker.
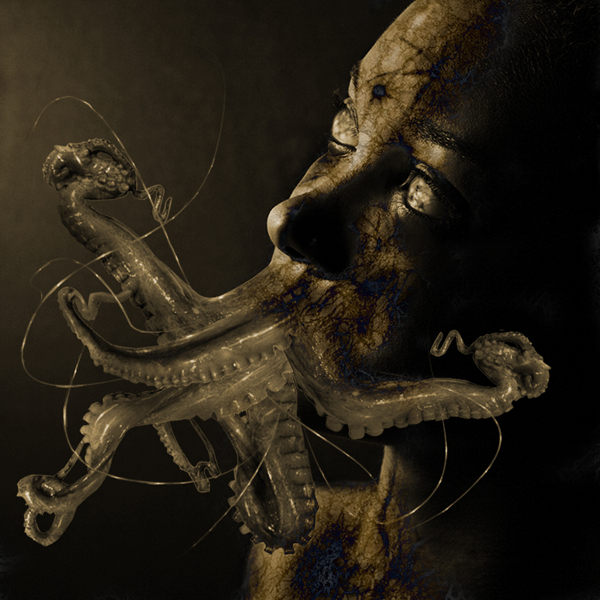
Now change the range to midtones and paint some shadows.
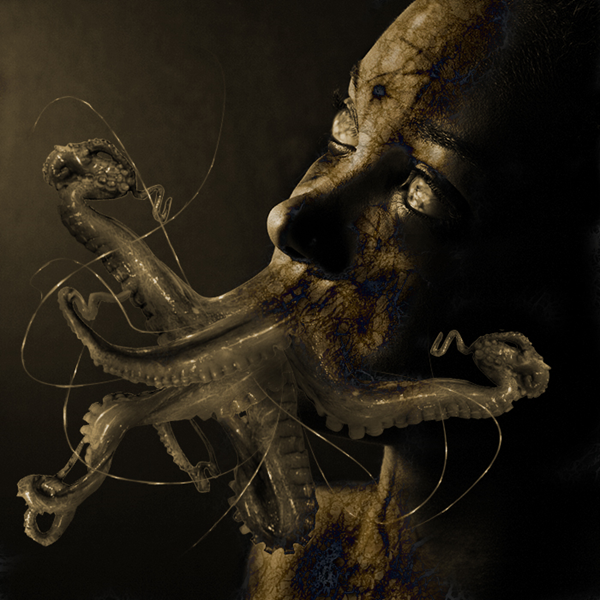
Now change the range to shadows and burn the areas that you feel needs to be darker to add depth.
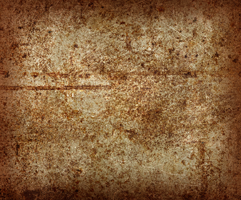
Step 12 – Add a rusty grunge texture
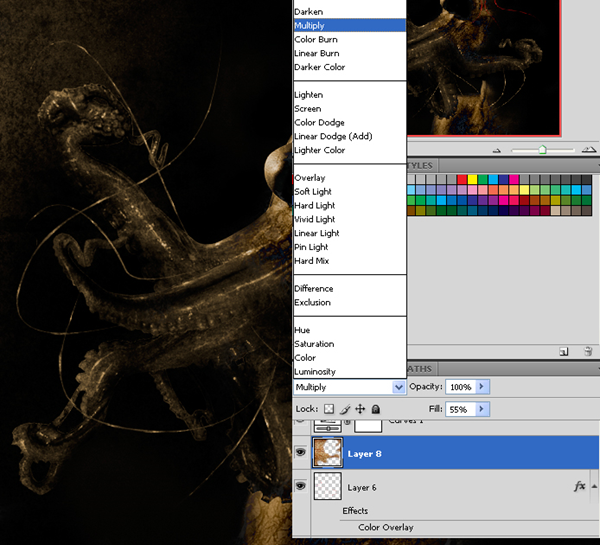
Open the image of the rusty texture and place it into the image of the alien. To do this, choose Select > All then Edit > Copy. Close the image of the texture to go back to the alien image. Choose Edit > Paste to paste the texture as a new layer.
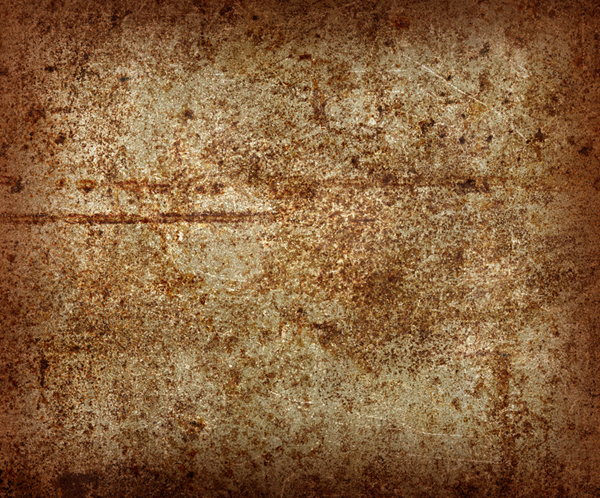
Change the blending mode to multiply then use the erase tool to erase the areas around the face so that the texture only affects the background.
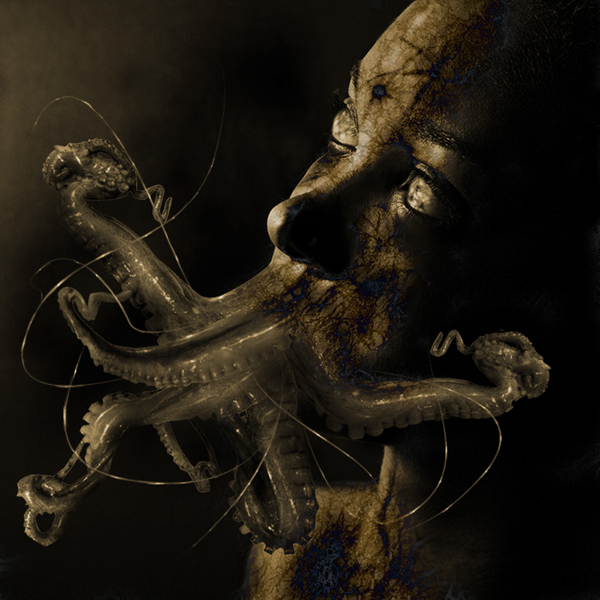
Final Results
Here is our completed image. We added more red abstract lines on the eyes using the same technique in step 9.

ReadMore...
10:45:00 PM
This Photoshop tutorial, you will learn how to use a variety of color, lighting, and cut and paste techniques to create a surreal photo manipulation. Combine your creativity with these Photoshop techniques to create your own photo manipulation artworks.
Combine Photo Elements to Create a Surreal Photo Manipulation
Preview of Final Results

Step 1 - Place the background
The first step it’s to place the sky, our background, into the image. As you can see, we have changed the color of it. We’re going to create a half of the image with a warm tone and another with a cool tone using the color balance tool. To do this, select the sky and then choose Image > Adjustments > Color Balance. Adjust the input sliders to add red and yellow. Select “highlights” and “shadows” then try adding more of these colors until you like the tones in your image.


Step 2 - Coloring the sky
Duplicate the layer with the sky. Now we are going to repeat the previous step with the color balance tool (Image > Adjustments > Color Balance) but this time adding blue and cyan tones. Remember to add some color to highlights and shadows as well.

Select the eraser tool then, in the option bar, select a blurred brush like shown below:
![]()
Now use the eraser tool to erase the left side of the sky in the top layer. This will make the warm tones from the layer below appear wherever you paint. When using the eraser, create curved strokes rather than a straight cut. When you have finished this step, you can reduce the opacity of the current layer to make the color more subtle.

Step 3 – Add the model
Now let’s open picture of the model. Use the magic wand tool to create a selection of the model then click on the add layer mask button in the layers palette to create a mask of the model. Refine the mask by painting in the layer mask using a brush with a harder edge. When you’re done, position the woman in the centre of the image.

Step 4 - Coloring the model
As you can see the lighting of the model isn’t blending in well with the background. We’re going to fix this with the levels tool. Choose Image > Adjustments > levels and move the input sliders to add contrast that matches the contrast of the background

Now choose Image > Adjustments > Hue/Saturation and reduce the saturation to reduce the saturation created when we used the levels tool. For the image used in this tutorial, the saturation was reduced by –24.
The next step will be exactly the same that in step 2 (when we used the color balance tool) except we’re going to use it on the model. First, duplicate the layer with the model so that you have two layers. Select one of the layers with the model then, like step two, use the color balance tool (Image > Adjustments > Color Balance) to add some red/yellow tones.

As you can see, it looks blended better with the left half of the background. Now, select the other layer of the model then choose Image > Adjustments > Color Balance and add some blue and cyan tones.
Now, as you did before with the sky, use the eraser tool with a soft edge to remove the left side of the layer with the girl in blue tones. Reduce the opacity on the current layer to reduce the strength of the color effect.

We’ve done the hardest part matching the lighting of the model with the background. Merge the layers of the model into one layer. Now you can play again withthe levels, color balance, and saturation (found in the Image > Adjustments menu) to make further adjustments.
Step 5 - Lightning the model
For the image used in this tutorial, the light comes from the background left. And to make the lighting match, we’ll have to darken the back of the model. To begin, select the burn tool.

Use a soft brush, edit the midtones, and set the exposure to around 30%.
![]()
Now use the brush over the models back. Try not make it too dark, just a little. Use this tool in the skirt too.
After that, select the dodge tool and paint the outline of the model (especially in her hair and her left arm).

Step 5 - Roots
Now we are going to add some roots and branches to the body of the model. It’s not difficult and you just need some images of trees and roots. We will be cutting parts of the root and tree and giving them some color like we did earlier with the color balance tool.

First step will be to look for a beautiful root and select it with your favorite tool (Magnetic lasso or quick mask mode for example). Don’t worry if it’s not a perfect selection, we will modify it later. Copy it and paste in our image.

As you can see the new image has not the same light and colors that the others, it looks out of place. What we have to do it’s the same that we did with the sky and the girl. Choose Image > Adjustments > Levels and adjust the input sliders. If you move the one in the center to the left the image will be brighter. If you move it to the right the image will be darker. In our case we are going to move to the right.
Now choose Image > Adjustments > Color Balance and add color depending of the place where you are going to put the root. If the root it’s on the left arm of the girl, for example, it will need red and yellow. But if it is on the right arm you have to add blue and cyan. This time we are going to add yellow and red. This is how it looks with the modifications:

When you have the root ready, just place it where you think that it will look good and select the eraser tool with a focus brush. Erase all the part that you don’t need and give the correct form to the root, now it’s when you have to improve the selection root.

The final step will be to use the burn tool in the areas where we should see shadows. For example, in the image below, it was used over the arm or in the bottom. I have added a little of blue using Image > Adjustments > Color Balance too. The last step is to erase the upper part of the root to create the look of a crease.

All the roots are added using the same process. The biggest impact to your results is choosing the photos. Once you have good photos to work with, you’ll have no problem getting good results using this technique.

There is just one last detail to explain. Sometimes, to get a more realistic feeling you can add a shadow to the root that falls over the skin or the dress. Take a look to this picture:

The only difference it’s the shadow on the right arm. To make this shadow just need to make double click over the root layer and the layer style menu will be open (or choose Layer > Layer Style > Drop Shadow). Select Drop Shadow and then use the arrow to move the shadow with freedom. When you have putted the shadow in the correct place just use the opacity bar in the drop shadow menu to add more or less intensity.

Step 6 - Ground and grass
Now we’re going to add the ground. The first picture used it’s a simple ground with sand taken from a photo of a beach.

The grass is taken from different photographs. First, create a new layer for the grass and position it behind low the layer with the model. Select and cut different parts of grass then mix them to create a field of grass like the image below.

This layer with the grass should be positioned between the layer with the model and the layer with the ground. Create a new layer and position it above the layer with the model and add some grass to cover the back of the models feet.

Finally, carefully add some grass and stone over the edge of the grass and the ground to hide the hard edges. It’s important that you inspect the edges thoroughly to hide any imperfections.

Step 7 – Add more roots
Now we’re going to add roots and flowers in the close-up. If you have read all the previous steps, you’ll have no trouble doing this. As mentioned before, it is very important that you choose good photos to work with. The photos should be high quality and in focus from foreground to background. If you use low resolution images, the finished results will look poor.
With this in mind, use a variety of photographs of flowers, roots, and trunks. Cut them out carefully with the lasso or quick mask tool and paste in the photo manipulation. Use the same coloring technique with the color balance tool (Image > Adjustments > Color Balance) that we used several times earlier.

To complete the blending of these images, we’re going to add to the ground. There are two ways to do this:
- This is the one that I explained at the end of step 5. Using the drop shadow in the layer style menu (Layer > Layer Style > Drop Shadow).
- Selecting the layer with the ground and using the burn tool in the areas where the shadows fall.
Step 8 - Dust
Now we are going to create some dust next to the feet of the girl. Use a picture with a cloudy sky then select one cloud using the lasso tool.

Copy it and paste in our document then choose Image > Adjustments > Levels. Move the middle input slider to the right to darken the cloud.

Then use the eraser tool in the edge of the cloud with a soft edge brush. Finally, choose Filter > Blur > Motion Blur and add the blur from left to right about 7 or 8 pixels. Position this layer behind the layer with the model. Duplicate the layer then move the new layer above the layer with the model. On this new layer, use the levels tool again but this time move the central input slider to the left to brighten the cloud.
The last retouching work will be to add red and yellow tones by using the color balance tool (Image > Adjustments > Color Balance).

Step 9 - Final Roots
We’re going to add the final roots. We need them to be positioned in a zigzag shape on the body of the model. To make this effect, we will need a combination of root photos like shown in the image below.

As always, the first step will be to select and match the different colors and lights of the roots using the levels tool (Image > Adjustments > Levels) and the color balance tool (Image > Adjustments > Color Balance). use the eraser with a soft edge to erase all that you don’t need and to give the ends of the roots a faded effect (so that they can be connected easily afterwards). Here is an example of combining different roots to create a large root:

It’s less difficult than it looks. Just be patient to find good images of roots and combine them using the same technique.
Step 10 - Some details
To make our photo manipulation more attractive we are going to add more details like flowers, petals, and a bird. I chose photos with objects that are easy to isolate. This will speed things up and ensure good results.
Step 11 - Adjustments Layers
To complete the photo manipulation, we’re going to add some adjustments layers. Select the upper layer then choose Layer > New Adjustment Layer > Hue/Saturation. Reduce the saturation by about –10 or to your likings. Experiment with using other adjustment layers to alter the color and effect of the final image.

Final Result
Making a complex photo manipulation like this is not difficult if you follow the a few principles of photo manipulation. Some important principles are:
- Choose good photos to start with.
- Make sure that the lighting and color of the objects in your composition match.
- Don’t rush. Take your time to find good images to work with and carefully blend them together. Ensure that there are no artifacts or unclean edges.

ReadMore...


